Menu

Rollercoaster Tycoon 2


Genre: Strategy
Release Year: 2002
Developer: Chris Sawyer Productions
Publisher: Infogrames
Age Rating: Everyone
Playability Status: Perfect
Tested On: Windows 8 x64
Availability: Copyright retained - Still sold

Don’t want the hassle?

banner-180x150Get this game pre-fixed, DRM free and ready to play from GoG.com. Fully working or your money back.

Why be a tycoon for oil, property or other such boring commodities when you can be a rollercoaster tycoon? In this strategy and simulation game you will get to build your own theme park, complete of course with huge roller coasters. Similar in concept to Theme Park World, successful tycoons will need to carefully manage their money while keeping visitors happy and re-investing in bigger more spectacular rides. If you were disappointed with the dreadful Rollercoaster Tycoon 4 that recently released on mobile devices, then what better time to dust off your old copy of the second game and build a whole new park?

Installation

The game should install from the original CD without any issues. While installing the game, be sure to choose “Custom” installation and then choose “Full Install”. Since the game places its save file in the same directory it is installed to, you may want to place the game in an alternative folder (e.g C:\Games) to avoid issues with save game files later.

If you have any of the expansion packs for the game, install them too before proceeding.

Patching

There was only one patch issued for the game. The patch updates the games copy protection for users who were having difficulty starting the game. The patch can be downloaded here. We recommend all users install the patch before attempting to start the game.

Once you have downloaded the patch, double click on it to install it. Be careful when installing the patch, it does not automatically detect the games installation folder. Users on 64 bit systems should be particularly aware that the patch will install into the “Program Files” and not “Program Files (x86)” directory unless the installation path is manually changed.

Running the game

Before starting Rollercoaster Tycoon 2, browse to the games installation folder and use the compatibility options to run the “RCT2.EXE” file in compatibility mode for Windows 98/Windows Me. Without this option set, we found the game simply would not start at all. This also applies if you bought the game from a download service such as GOG.com. If you are unfamiliar with using compatibility options, see this tutorial.

Tweaking visual quality

There are only a couple of visual quality options for the game. To change them, you first need to start a new game and then go to the Options menu (the small floppy disc icon). You should then see the option to change the screen resolution and toggle Landscape Smoothing off or on. Make sure this is on and set the game to any resolution you like. The maximum possible is 1280×1024, so if you are playing on a TV or high-definition monitor, you should probably choose 720p, which is 1280×720.

Troubleshooting

Black screen after changing screen resolution:- If the game crashes or goes to a black screen after changing resolution, use the Task Manager to exit the game, make sure to disable any secondary monitors and then try again.

Problems saving games or patching:- Like many older games, Rollercoaster Tycoon 2 places its save game files and various configuration files in the same directory that it is installed to. This can cause problems on more modern versions of Windows as programs are not normally permitted to write to the program files directory. To avoid this problem, either install the game to an alternate location (e.g c:\Games\RCT2) or manually edit the permissions on the  “RollerCoaster Tycoon 2” folder. A tutorial on editing folder permissions is available here.

Fallout


Genre: Role Playing
Release Year: 1997
Developer: Interplay Entertainment
Publisher: Interplay
Age Rating: 18+
Playability Status: Perfect
Tested On: Windows 8 x64
Availability: Copyright retained - Still sold

Atomic bombs have destroyed the world, leaving behind a devastated wasteland full of monsters, radioactive ooze and desperate, often violent, survivors. Sounds like a great setting for a videogame doesn’t it? Fallout was the first post apocalyptic roleplaying game in the now well established Fallout franchise. While set in the same alternate history universe, it plays quite differently from the more recent entries in the series. Rather than a first-person perspective, the game is turn based and played out on a large grid representing the current area. While its visuals may have dated, there’s still a hugely engrossing roleplaying game to get stuck into here and one that newcomers to the series can enjoy just as much as those of us who remember it first time around.

Installation

We tracked down an original 1997 copy of the game and managed to install it on our Windows 8 PC without any issues. Note that there were two versions of the game originally released. One version was for DOS and the other was for Windows. This tutorial is for the Windows version only. If you want to play the DOS version you could use DOSBox, however you won’t then get access to all the patches and fan created content.

When installing the game, we recommend you install it to a folder other than your program files or program files (x86) directories. You should also choose to install all the components (the option that the installer calls the “huge” installation). Keep a note of where you install the game as you will need to find this folder again when you come to patch the game.

Patching

There were several patches released for the game during its lifetime. The last official patch was patch 1.1, but the fan community have launched several other patches since then. We strongly recommend using the Fallout Fixt fan-made patch and enhancements bundle. You can download this package here. Follow the instructions on the page to make sure you install the patch correctly. At the time of writing this article, you need to download the main Alpha 6.7.2 and then the separate 6.7.2.1 update.

A quick note about the Fallout Fixt patch. There are two versions you can download. “Fixes Only” and “Full Custom”. The “Fixes Only” version simply includes bugfixes and patches, leaving the game as true to the original 1997 experience as possible. The Full Custom version includes enhancements and other improvements to the game. We recommend you go for the “Full Custom” version. This version is still true to the original Fallout vision while also fixing and enhancing a few core features for the best experience. It also includes a tool to allow you to upscale the games graphics to more modern resolutions.

Installing the Fallout Fixt patch is easy but not quite as straightforward as it could be. Observe the following notes while installing the patch.

First of all, you must make sure that when you run the Fallout_Fixt file you downloaded, that you run it by right clicking on the file and choosing “Run as Administrator”. If you do not, you may encounter an error when the installer tries to update some registry settings.

The patches do not automatically detect your Fallout game folder, so make sure to browse to the correct directory.

The installer will suggest that you disable UAC because “it sucks”. We strongly disagree with this, do not disable UAC if you value your computers security!

The installer will offer you four different types of installation. You can choose the “Fixes Only” option to keep the game as pure as possible, or choose between “Standard”, “Full”, or “Custom”. Selecting custom will allow you to tweak several elements in the game, but be warned, while tweaking these settings there are potential spoilers.

If you have never played the game before, we’d recommend the “Full” installation type in order to experience the definitive Fallout experience.

Tweaking visual quality

With the Fallout Fixt patch installed, you can now tweak the games resolution. Open the Fallout game folder and find the “f1_res_config” file. Double click on it to launch the tool. The picture below shows the window that will then appear.

fallout-high-res

Using the tool is fairly straightforward. Make sure that, at the bottom, you see “The Hi-Res Patch is Enabled.” If not, click the button to enable it. Graphics mode should be set to DirectX 9 on most PCs.

You should choose a colour depth and refresh rate next. Set Colours to “32 bit”. Refresh rate can match your monitor, this is usually 60hz for monitors or 60hz or 59hz (59.94) for televisions.

Finally, choose a resolution. If you run the game in a high resolution mode like 1080p (1920×1080) you may find the graphics too small to see. This is especially true if you’re playing from a couch rather than a monitor. You can either choose a lower resolution (such as 720p) or use the “Scaling X2” option which will make the graphics bigger.

Click on “Done” when you have configured these options. The next time you start Fallout, it should run in your chosen screen resolution.

Troubleshooting

Problems saving games or patching – Like many older games, Fallout places its save game files and various configuration files in the same directory that it is installed to. This can cause problems on more modern versions of Windows as programs are not normally permitted to write to the program files directory. To avoid this problem, either install the game to an alternate location (e.g c:\Games\Fallout) or manually edit the permissions on the  “Fallout” folder. If you used the default installation directory from the original installer, the games folder can be found at “C:\Program Files\Interplay\Fallout”. A tutorial on editing folder permissions is available here.

Game doesn’t run at your chosen screen resolution – If this happens, set the desktop resolution to the resolution you want to use in-game before you start the game. You can set your desktop resolution by right clicking anywhere on the desktop and choosing “Screen resolution”.

The Lost Vikings


Genre: Platform
Release Year: 1992
Developer: Silicon & Synapse
Publisher: Interplay
Age Rating: Everyone
Playability Status: Perfect
Tested On: Windows 8 x64
Availability: Officially released for free

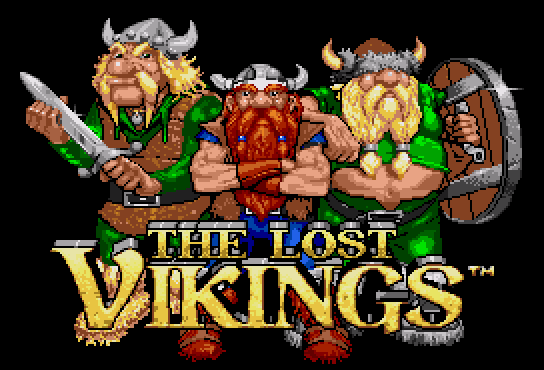
Vikings are well known for their war-like pillaging and conquering, so it might come as a surprise to find that this Viking themed game isn’t about slaying your enemies but more about solving puzzles. Erik the Swift, Baleog the Fierce, and Olaf the Stout have been abducted from their village by aliens. The trio each has a different skill and they must work together in order to escape. Only Baleog can attack, for instance, while Erik can run and jump and Olaf can block anything, even alien laser beams, with his shield. By switching between the three characters the player must solve various puzzles and ensure all three of the Norse warriors make it home to their village.

Installation

Lost Vikings is a DOS game and so requires DOSBox to run on a modern computer. For those of you who have the original game in your collection, it is possible to use the original media, however it is quicker and easier to simply download the game from Blizzard Software, who have very generously put it as a free download on their website. Click this link to download it.

Once downloaded, all you need to do is copy the files from the zip folder to any directory on your computers hard drive. You can then start the game by clicking on the “The Lost Vikings.exe” file inside the directory.

Configuring controls

The Lost Vikings does have basic support for game controllers. However, if you have access to a copy of Xpadder, we strongly recommend using that instead. Below is a screen shot of our Xpadder profile which we created for use with our Xbox 360 controller while playing the game.

vikings-xpadder2

With this arrangement, the controls work like this.

A – Select menu option, Primary action (Attack, Jump or Shield, depending on Viking), Skip cutscene

B – Secondary action (different depending on Viking selected)

LB – Select previous Viking

RB – Select next Viking

Start – Pause (Pause menu also gives you the option of restarting the level)

D-Pad or Analogue stick – Move Viking, select options

Once you have Xpadder set up, you’re going to want to start Lost Vikings and remove the existing joystick control bindings. Hold down the control key on your keyboard and press F1. This takes you to the remapping screen. Remove all bindings for Axis 1/2 and 3/4. For more information on how to do this, see our DOSBox tutorials here.

With the game installed and controllers configured you’re all set to play. There are some visual settings you can tweak but they are entirely optional.

Tweaking visual quality

As with all DOSBox games, there are some visual quality settings you may wish to alter depending on your preferences. In the Lost Vikings folder there is a file called “dosbox.conf”. If you open this file in a text editor you can make some changes. Find the section that begins [render] and you can add a scaler option for instance. For information on how these scalers affect graphics quality, see this page.

So for instance if you like the scanline look* you could add the following line:-

scaler=tv3x

Make sure to save the file when you are done. The next time you play the game your chosen graphical filter will be active.

*Yes, before anyone writes in, I know old DOS games didn’t have scanlines, but I first played this game on the Amiga on a 15khz display that DID have scanlines and I just like how it looks.

Watching the games intro with the fake scanline graphical filter enabled. Click the picture to see a bigger version.

Watching the games intro with the fake scanline graphical filter enabled. Click the picture to see a bigger version.

Star Wars Episode I: The Phantom Menace


Genre: Third Person Shooter
Release Year: 1999
Developer: Big Ape Productions
Publisher: LucasArts
Age Rating: 12+
Playability Status: Perfect
Tested On: Windows 8 x64
Availability: Copyright retained - Out of print/unavailable

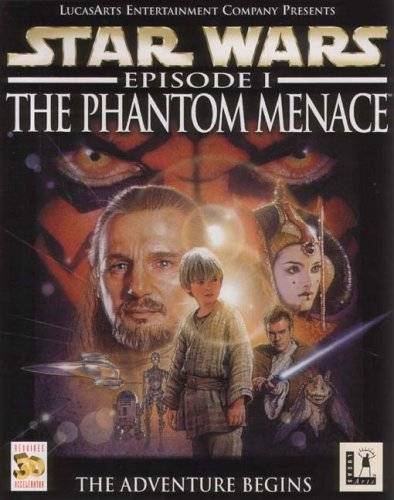
While the first of the Star Wars prequels might not have pleased everyone, back in 1999 it was big news at the box office and the Lucasfilm marketing machine was working in overdrive. The now sadly disbanded LucasArts software house produced and licensed several games based on elements or characters from the movie, including the official Phantom Menace video game for PC and consoles. It may not be the most critically acclaimed Star Wars game ever released, but this movie tie-in holds plenty of happy memories for those gamers who played it first time around. Time certainly hasn’t been kind to the game and its dated graphics and gameplay are unlikely to win it any new fans. Nevertheless, with new movies in the making, many nostalgic gamers will be dusting off their old copies and filling the boots of Obi-Wan Kenobi and his friends and allies again.

Installation

The Phantom Menace should install without any issues on 32 bit versions of Windows. Unfortunately, like many older LucasArts games, the game uses a 16 bit installer and is therefore not compatible with 64 bit versions of Windows. To solve this problem, we’ve produced a replacement installer that will allow you to install the game on more modern versions of the operating system. To use the installer, simply download it here (link broken? Let me know here) and then, with the Phantom Menace CD in your computers optical drive, run the installer and follow all the on-screen prompts.

Patching

There was only one patch released for the game which fixes issues with some sound cards. We recommend that everyone installs the patch before playing the game. If you have installed the game using our replacement installer, you do not need to install the patch as it is included in with the new installer. To download the patch separately, click here.

With the game installed and patched, you’re now ready to start it. Click on the “Play The Phantom Menace” shortcut on your desktop or Start menu/screen. Before you get started with the game though, there are several options you may wish to reconfigure.

Tweaking visual quality

The years have not been kind to the games graphics, so squeezing every last bit of quality out of the old assets is highly recommended. Start by loading the game and from the main menu, choose “Options” and then “General Options”. On this screen you can set the screen resolution. The highest resolution you can choose here is 1280×1024. Most modern PC monitors should manage this resolution just fine. Later in this section we’ll show you how you can add your own resolutions too.

Once you have set the screen resolution, you should head over to the “Performance Options” menu. On this menu there is a sliding control at the top of the screen that changes the computer rating. Make sure that the “Computer rating” is set to “Superior” by moving this slider all the way to the right. Any reasonably modern computer, even a more modest spec system, should be able to run the game at this setting.

It is also possible to play the game in modern high definition resolutions, such as 1080p or 720p. Remember that these resolutions are widescreen, although the game was released before widescreen monitors were commonplace, it scales surprisingly well to widescreen modes and the graphics do not appear to be stretched or out of proportion. To run the game in a custom resolution, you will need to edit a configuration file within the games folder. If you are unfamiliar with editing configuration files, see this tutorial.

The file we need to edit is called “obi.ini”. It is in the games installation directory at the very top level. Right click on the file and choose “edit” to get started making changes. To change the games screen resolution, find the lines “screen_width” and “screen_height” and edit them accordingly. For 1080p use the following values:-

screen_width=1920
screen_height=1080

For 720p use:-

screen_width=1280
screen_height=720

Be sure to save the file when you are done editing it. If you make a mistake while editing this file and the game will no longer start, remember you can always delete it and the game will simply create a new one. You will of course have to reconfigure all of your options again if you do this.

Tweaking sound quality

The Phantom Menace supports DirectSound and EAX as well as several other now obsolete surround sound standards. Due to changes in DirectSound introduced in Windows Vista, most users will be restricted to the “Fast 2D positional audio” option. You can try the Dolby Surround options too, but there’s certainly no guarantee they will work.

On any computer running Windows Vista or later, the DirectSound3D options will not work correctly without additional software. If you have a sound card that supports Creative ALchemy, you can use this software to restore surround sound capabilities to the game. Start by exiting the Phantom Menace game and then starting the ALchemy tool. On the main ALchemy window, click on “Add”. In the window that then appears, enter “Star Wars – The Phantom Menace” as the game name and choose “Use Game Path”. Use the “…” button to browse to the Phantom Menace game folder then click on “OK”. Finally, select “Star Wars – The Phantom Menace” from the left hand side of the ALchemy window and click on “>>” to activate the profile.

With ALchemy configured, start The Phantom Menace again and go to the Options menu and choose “Sound Options”. You should now be able to select “Microsoft DirectSound3D with Creative EAX” and enjoy full surround sound in the game.

Configuring controls

The Phantom Menace has limited support for game controllers. Although analogue controllers are recognised and can be configured, they can only be used digitally, that is, you need to hold a button down on your pad in order to run. You can configure controllers by starting the game, going to the Options menu and choosing “Control Options”, and then choosing “Game Controllers”.

If you have Xpadder, we recommend disabling controller support in-game (this can be done in the Control Options” menu) and configuring the controls entirely using Xpadder. Below is the Xpadder profile we created for the game, based on the controls for the Playstation version.

phantom-menace-xpadder

With our Xpadder configuration, the controls are mapped like this:-

Action Xbox Controller Keyboard
Move Left stick or D-pad Arrow keys
Run RB or fully push left stick (with distance zone configured) Shift
Jump A X
Activate/Use B Space
Attack X Control
Force/Push Y Z
Dodge LB (Hold) + Direction Alt (Hold) + Direction
Dodge (Left) Right stick left Alt + Left
Dodge (Right) Right stick right Alt + Right
Previous Weapon LT Numpad –
Next Weapon RT Numpad +
Pause Start Escape
Quick Save Back F5
Confirm menu choice A Enter

To run in the game, you hold down shift. If you want your character to run when you push the analogue stick down, you will need to create a distance zone on the left analogue stick. There’s a tutorial on how to do that available here.

Troubleshooting

COULD NOT INITIALIZE GRAPHICS HARDWARE error – This error generally seems to happen on computers equipped with ATI/AMD graphics cards. Since we don’t have this kind of hardware in our test PC, we’d appreciate it if our readers would test this fix for us. Please download the zip file here (link broken? Let me know here). Once downloaded, copy ALL the files from the zip file to your Phantom Menace game directory, replacing the existing WMAIN.EXE file that’s in there already (you should definitely make a backup copy of the file WMAIN.EXE so you can undo the changes easily if necessary). Now, try running the game again and let us know in the comments if the problem is resolved.

If the fix above doesn’t work, you can also try dgVoodoo2, so long as your PC has a DirectX 11 capable graphics card or chip. Click here for a tutorial on how to install and use dgVoodoo2. When using dgVoodoo2, please use the original WMAIN.exe and not the patched version from the download link above (you did take a backup copy of your original WMAIN.exe didn’t you? If not you may need to reinstall the game).

Game crashes or glitches on startup – If you have problems starting the game, try editing the “Obi.ini” file and choosing a higher screen resolution than the default 640×480. See the instructions above under “Tweaking visual quality” for instructions on how to do this. If you cannot find an Obi.ini file in your games directory, download this one, unzip it and place it in the games folder. This ini file contains the default options for the game, except for screen resolution which has been increased to 800×600.

Problems saving games or settings – Like many older games, Star Wars Episode I: The Phantom Menace places its save game files and various configuration files in the same directory that it is installed to. This can cause problems on more modern versions of Windows as programs are not normally permitted to write to the program files directory. To avoid this problem, either install the game to an alternate location (e.g c:\Games\The Phantom Menace) or manually edit the permissions on the  “The Phantom Menace” folder. If you used the default installation directory from the original installer, the games folder can be found at “C:\Program Files\LucasArts\The Phantom Menace”. If you used the replacement installer however, the default installation folder is “C:\Games\The Phantom Menace”. A tutorial on how to edit folder permissions can be found here.

Hostile Waters


Genre: Flight Simulator, Real Time Strategy
Release Year: 2001
Developer: Rage Games Limited
Publisher: Rage Games Limited
Age Rating: 18+
Playability Status: Perfect
Tested On: Windows 8 x64
Availability: Copyright retained - Still sold

Don’t want the hassle?

banner-180x150Get this game pre-fixed, DRM free and ready to play from GoG.com. Fully working or your money back.

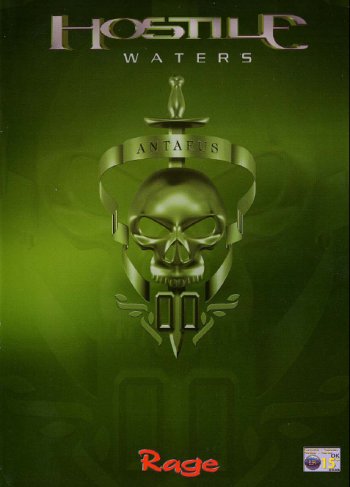
Here we go again! In the near future, war has been abolished and the world lives in peace, which sounds like fantastic news for the human race. However, since this game is called “Hostile Waters” you probably already guessed that the peace doesn’t last. A group of megalomaniac dictators decides peace is for pussies and decides to launch a missile attack against the rest of the world. The surprisingly capable intelligence services of the newly pacified planet are able to predict this threat. With weapons a thing of the past however, all they can give you, the saviour of the human race, is one beaten up old aircraft carrier. It’s not just any old rusty floating runway though, the Antaeus comes with nano technology and is capable of repairing itself and building a whole new army of vehicles. It’s up to you to command this vessel and unlock its secrets. Hostile Waters (known as Hostile Waters: Antaeus Rising in the USA) is an engrossing, classic strategy and action title inspired by the well respected classic Carrier Command.

Installation

The game should install on modern PCs without any issues. We recommend performing a full installation for best performance.

Patching

There was only one patch released for the game, which works only with the European version of the game. Apparently, no patch is required if you are playing a US version. To download the patch, click here (link broken? Let me know here). The file is downloaded as a zip folder. Simply open the folder and run the HostileWatersPatch_English.exe file inside, then follow all on-screen prompts.

Running the game

Start the game as normal from the Start menu or Start screen. If you run the game from the Start menu/screen shortcut, it will launch the Hostile Waters setup program first. Click on the “Hardware Setup” button first and the following window will appear (click on the picture to see a bigger version).

hostile-waters-setup

The first decision you need to make is what screen resolution to run Hostile Waters in. Whatever selection you choose, make sure you select a mode that is 32 bit colour. You can run Hostile Waters in a widescreen mode (such as 1920×1080, which is 1080p), though the game isn’t optimised for this kind of display. In practise the game performs reasonably well when running in widescreen. While controlling your vehicles everything performs fine, though you may find that when accessing menus and tactical options, that certain elements on the screen are cropped. If this concerns you, choose a 4:3 (non widescreen) screen mode such as 1280×1024 instead.

The other options on this screen should be set as per the screenshot above. Under troubleshooting, you should select “Disable Joystick”. Joystick support appears to be broken in the game and leaving it enabled will typically cause your vehicles to spiral out of control. There aren’t enough buttons on a typical joystick or gamepad to manipulate the game anyway, and the games instruction manual and quick reference sheets make no reference to joystick control at all.

Before we click on “OK”, lets take a look at the “DirectSound” tab. Click on “DirectSound” and the following window will appear.

hostile-waters-setup-sound

Like many older games, Hostile Waters supports both hardware and software sound. Back when the game first came out in 2001, the amount of computing time required to process audio could have a detrimental effect on gameplay and so offloading this processing to a dedicated audio processor was common. These days, with modern multi-core computer processors there is simply no need for dedicated audio processing hardware. Crank up the quality settings to the maximum by selecting “Manual” configuration mode, increasing “Number Of Voices” to 32 and changing the bottom drop-down box to “HRTF Full – highest quality and large processing”.

As seasoned PC retro gamers will know, support for hardware accelerated audio through DirectSound was dropped in Windows Vista. That means that you shouldn’t try to disable software mode for audio, unless you have a PC equipped with a sound card that supports DirectSound emulation, such as a Creative Audio sound card that supports ALchemy. In this case you can add Hostile Waters to the Creative ALchemy software and then use hardware accelerated audio mode instead. However, in practise this didn’t seem to make a noticeable difference to sound quality while playing the game.

With basic sound and graphical options configured, you can now click on “OK” and start the game by clicking “Play Hostile Waters”. When the game first starts, it may minimise itself to the taskbar, but don’t worry, simply click on the taskbar icon and the game will maximise again and stay maximised.

Tweaking visual quality

As well as the visual options you can configure in the setup program, there are several visual quality options you can configure in-game too. Start the game, watch the intro (if you haven’t already) and then you will be taken to a main menu. Choose “Options” and then  “Effects”. On the sub-menu that now appears, you can comfortably turn all the settings on or dial them up to maximum on even a modest modern PC.

If you’re comfortable with using the registry editing tool, there’s one more tweak you can make. Exit the game and then start the registry editor (regedit). If you are on a 64 bit machine, navigate to the following key:-

HKEY_LOCAL_MACHINE\SOFTWARE\Wow6432Node\Rage\HostileWaters\Options

On a 32 bit machine, navigate to the following key:-

HKEY_LOCAL_MACHINE\SOFTWARE\Rage\HostileWaters\Options

Find the string “FullScreenAntiAlias” and click on it and change its value from 0 to 1. Now start the game again, this should improve the quality of the 3D graphics by smoothing the edges of objects. If you need a simple tutorial on how to use the registry editor, you can find one here.

Other tweaks

Since the games configuration tool needs to run as administrator, the game will ask for administrator rights every time you start it. If you are installing the game on a standard user account and don’t want the hassle of entering your administrator password every time the game is started, simply change the Start menu/screen shortcut to point to HostileWaters.exe rather than HostileSetup.exe. By running HostileWaters.exe the game will launch directly, without loading the configuration tool first. See the troubleshooting section regarding save games if you do choose to do this.

Troubleshooting

Problems saving games – Like many older games, Hostile Waters places its save game files in the same directory that it is installed to. This can cause problems on more modern versions of Windows as programs are not normally permitted to write to the program files directory. By default the game will ask for administrator rights each time you run it, which will grant it permission to write to any folder on your PC. If you followed the steps above and changed the games shortcut so that you don’t get the UAC prompt each time it is launched, you may then have problems when it comes to saving your progress. To avoid these problems, either install the game to an alternate location (e.g c:\Games\HostileWaters) or manually edit the permissions on the Hostile Waters folder. If you used the default installation directory, the games folder can be found at “C:\Program Files (x86)\Rage Software\Hostile Waters”. A tutorial on how to edit folder permissions can be found here.

Vehicles are uncontrollable or pull to the right – First of all, make sure you disabled joystick control in the Hostile Waters setup program. If you still have issues, disconnect all game controllers from your PC before starting the game.

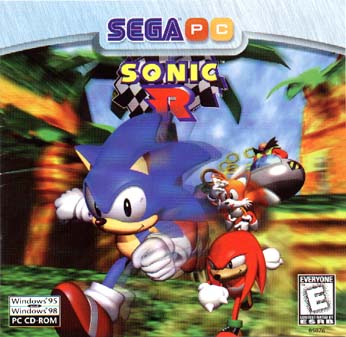
Sonic R improvements

Sonic R box front

Just a quick note, we have significantly improved our guide to running the classic cartoon racing game Sonic R on modern PCs. As well as making it easier to start the game, you can now also run the game in HD resolutions! Check out the improved guide here.

Bugs Bunny: Lost in Time


Genre: Platform
Release Year: 1999
Developer: Artificial Mind and Movement
Publisher: Infogrames
Age Rating: Everyone
Playability Status: Fully playable (minor issues only)
Tested On: Windows 8 x64
Availability: Copyright retained - Out of print/unavailable

When Bugs Bunny made his screen debut in 1940, would the animators have imagined he’d still be making us all smile more than seven decades later? With all those years on our screens, if anyone’s qualified to time travel, it must be this wise cracking hare. In this 1999 platform title, Bugs unwittingly activates a time machine believing it to be a carrot juice dispenser. This mistake sends him on a quest across the eras to retrieve the magic golden clocks so that he can return to his own time. The game was a modest commercial success and spawned a sequel, Bugs Bunny & Taz: Time Busters.

Installation

Bugs Bunny: Lost in Time should install on modern systems without any major issues. Rather than using the autorun menu to launch the installer, you should use Windows Explorer/File Explorer to browse to the CD-ROM. Explore the contents of the disc and locate the “Setup.exe” file on the CDs root folder. Double click on this file to start the installation process. Remember that the game saves configuration data and save games to the same folder it is installed to, so you might want to choose an alternative folder to avoid problems with saving your games later (see the troubleshooting section for more information on this).

Configuring the game

There are no patches to install for the game, so once installation is complete, you can start the game from the Start menu or Start screen shortcut. The games launcher will then appear. Before you start the game, you should click on “Settings”. The window shown in the picture below will then appear.


bugsbunny-config


First of all, make sure that the “Renderer” setting is set to “Using 3D card”. Normally, this is the correct option for any game since you want to take advantage of your 3D card where possible. However, in this game we found that software mode worked better, with less graphical glitches, on some PCs. Try hardware mode (Using 3D card) first however.

The launcher has a minor compatibility issue on modern computers, as you can see the box where you pick your screen resolution is blank. Fortunately, this can be set in-game too, so for now, choose “Windowed” mode and then choose “640×480” resolution. Click on “OK” when you are done. You have now configured all the settings you can change here, so click on “Play” to start the game.

Tweaking visual quality

The game has a handful of visual settings you can tweak. Before you can change them, you will need to start a new game or load an existing one. Once you have watched the intro and have control of Bugs on the tutorial level, press the Escape key on your keyboard. The game will pause and a menu will appear. Use the arrow keys and enter to select “Video”. The sub menu that now appears will allow you to choose a screen resolution and toggle between windowed and full screen mode. The games maximum screen resolution is 1024×768 and for modern monitors this is what you should select. This is a non-widescreen (4:3) aspect ratio mode and should appear with black borders on a widescreen monitor.

The Renderer option should be set to either “Using 3D Card” or “Without 3D card for fast computers”. Choose whichever option looks best and has the least glitches. The only other setting is “Fog Distance” which should be set to “Far”. Select “Apply” when you are done and the settings will be saved and applied.

Configuring controllers

Bugs Bunny: Lost in Time has limited support for joysticks and game controllers. By starting a game and pressing escape, then selecting “Controls”, you can remap both keyboard and gamepad controls. The table below shows how to map your controller buttons. This is based on the controls for the original Playstation version of the game. When mapping buttons, they will appear as “BUTTON0”, “BUTTON1” in the game. The “In-game Button” column shows which button number should appear for that action when using the Xbox 360 controller.

Action Playstation Controller Xbox Controller In-game Button
Look Triangle Y BUTTON3
Crouch Circle B BUTTON1
Jump Cross A BUTTON0
Kick Square X BUTTON2
Roll L1 LB BUTTON4
Action/Use R1 RB BUTTON5

You can play the game like this, but unfortunately there’s no way to manipulate the camera which can be frustrating. Luckily our old friend Xpadder can come to the rescue once again. Below is our profile for Xpadder, note that when using our Xpadder profile you still need to setup the gamepad in-game first. We then use Xpadder to fill in the gaps that the games own configuration tool leaves.


bugsbunny-xpadder


The configuration is fairly straightforward. E and R are mapped to the pads analogue triggers. This lets the player use the “Roll” and “Action/Use” actions from the analogue triggers, since your fingers naturally rest more easily on the triggers than the LB and RB buttons, this is preferable. The arrow keys have been assigned to the d-pad, this allows the player to navigate the games menus without having to reach for the keyboard. Escape has been assigned to the start button, allowing the game to be paused from the gamepad too. Enter has been mapped to the A button, this allows for menu options to be selected and the game to be started. Finally, Q and W are mapped to the second analogue stick, this allows the camera to be easily rotated around Bugs.

With controls now configured you are all set to start your adventure through time. Good luck travel hare!

Troubleshooting

Game crashes on startup – If the game crashes on startup, chances are you have it set to 320×240 fullscreen mode. Modern graphics cards cannot run this screen mode. Launch the game again and change it to windowed mode. Then, once you are in the game, hit escape and change the visual settings to 1024×768 full screen.

Graphical corruption/errors – There are a number of graphical errors when running the game on some modern cards. You can notice them most on the level select screen (look at the graphics on the vortex around Bugs’ time machine, and the particles coming from the bottom of it) and the graphics around the edge of lakes and rivers (bad/incorrect shadows). If you experience this on your PC, try switching to “Software rendering (Without 3D card for fast computers)”. You can do this in-game by pressing the Escape key then choosing “Video” from the options menu.

Installer does not start – If the installer doesn’t seem to be starting, try logging in with a user account that has full administrator privileges or simply restart your computer and try again.

Problems saving games or settings –  Like many older games, Bugs Bunny: Lost in Time places its save game files and various configuration files in the same directory that it is installed to. This can cause problems on more modern versions of Windows as programs are not normally permitted to write to the program files directory. To avoid this problem, either install the game to an alternate location (e.g c:\Games\Bugs) or manually edit the permissions on the  Bugs Bunny: Lost in Time folder. If you used the default installation directory, the games folder can be found at “C:\Program Files (x86)\Infogrames\Bugs Bunny Lost In Time”. A tutorial on how to edit folder permissions can be found here.

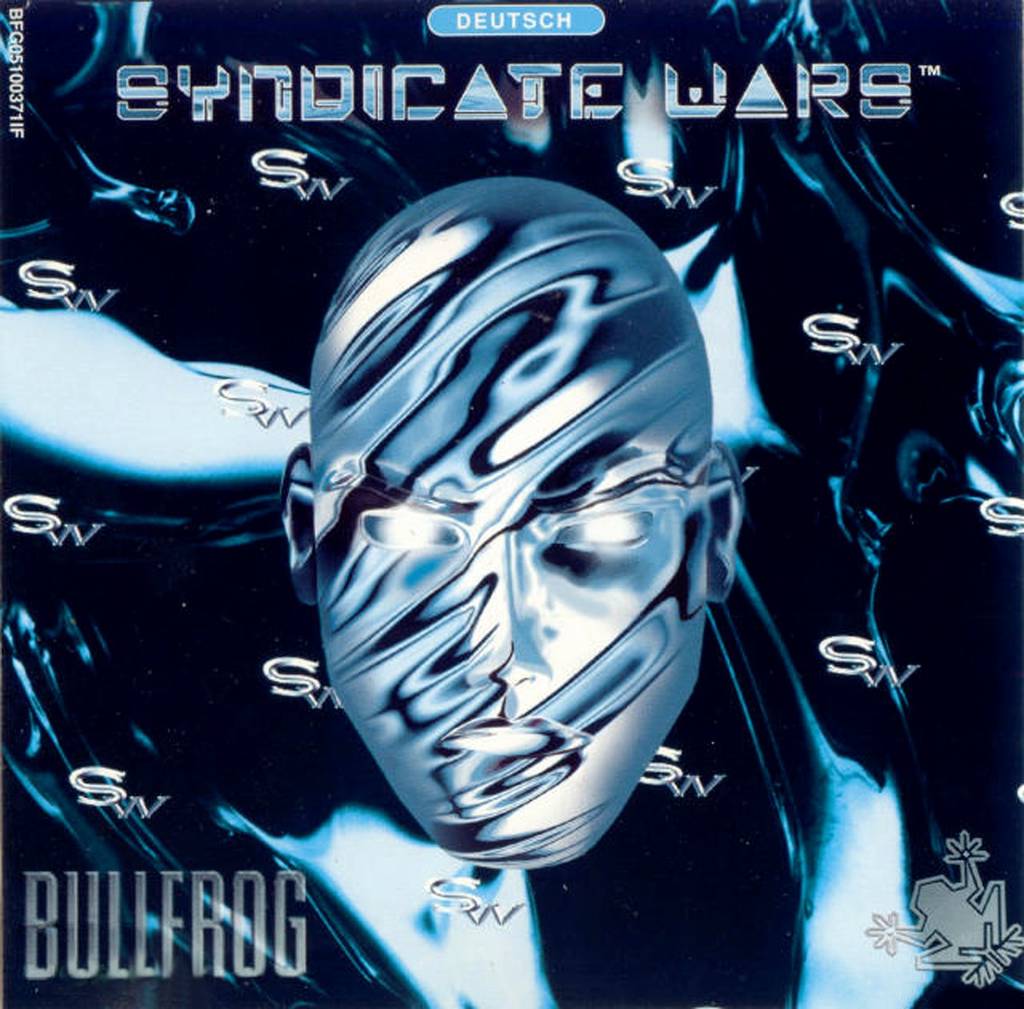
Syndicate Wars


Genre: Real Time Strategy
Release Year: 1996
Developer: Bullfrog Productions
Publisher: Electronic Arts
Age Rating: 18+
Playability Status: Perfect
Tested On: Windows 8 x64
Availability: Copyright retained - Still sold

Don’t want the hassle?

banner-180x150Get this game pre-fixed, DRM free and ready to play from GoG.com. Fully working or your money back.

Ever feel like big corporations are gaining too much power? Don’t be silly, must be the chip in your head not working correctly. Now, if you’d like to step into this darkened alley, this gentleman in a trench-coat will re-educate you with his Uzi 9mm. If you hadn’t already guessed, Syndicate Wars is another game set in a violent, dystopian future. As an executive in the evil EuroCorp, you will take control of four cyborg assassins as you fight against civilian uprisings and the deadly Church of the New Epoch. In 1996, the games dark cyberpunk theme and frantic combat won it many fans. Sadly the games visuals have dated rather badly and its gameplay can feel simplistic compared with modern RTS titles. Nevertheless, there’s still a very enjoyable and often challenging game lurking under that dated exterior.
Preparing DOSBox

To run Syndicate Wars on your PC, you should use DOSBox. Set up your DOSBox configuration according to our tutorial here. Set up DOSBox with the SVGA configuration we detail on that page. Syndicate Wars requires one change to the default DOSBox configuration. Search for and launch “Dosbox Options” on the Start menu or Start screen, and the file will open in Notepad. Find the section that begins “[cpu]”. Now, change the line that reads “cycles=auto” to read “cycles=fixed 70000” (do not copy the quotation marks).

Don’t forget to change this value back to “cycles=auto” when you run your other games. Save the file and now you can move on to installation. If you want to avoid having to change this file every time you play, see our tutorial on custom DOSBox configuration files.

Installation

With your DOSBox configured, insert your Syndicate Wars CD into your PCs optical drive and start DOSBox. Enter the following commands into the DOSBox window to install the game, pressing enter after each command.

D:
install

The games installer will then start, click on “Login” to start the installation, then choose your language and click on “Continue”. You should now see the screen shown in the picture below.

syndicate-wars-sound-settings

Like most DOS games, we now have to configure sound options, luckily DOSBox makes this fairly straightforward. First click on “Set Sound”. A list of possible sound configurations will be displayed. choose “Creative Labs Sound Blaster 16 or Awe32” then choose “Configure Automatically”. If you click “Sound Test” now you should hear a sound. Click on “Accept” to go back to the previous menu.

Now, click on “Set Music”. Again, a list of music playback devices will be displayed, click on “Creative Labs Sound Blaster 16” then choose “Configure Automatically”. A “Music Test” button should now appear, if you click on it you should hear a jingle. Click on “Accept” to go back to the previous menu.

Now all that remains is to click on “Install”. Leave the installation path as “C\SWARS” and choose “Full Install”. Wait while files are copied and configured. When installation is complete, click on “Logout” and then “Quit”. The game is now installed.

Starting the game

Once the game is installed, you can run it at any time by inserting your Syndicate Wars CD-ROM, starting DOSBox and then typing the following commands.

c:
cd swars
play

The game should then start.

Tweaking visual options

Syndicate Wars has a few visual quality options you will want to set before you start playing.  To change them, start the game, choose “log in” and choose an alliance (or load a saved game). Once at your executives desk, click on “System” and then “Visual Depth”. The options shown in the picture below will then appear.


syndicate-wars-graphics-settings

For all the options, the low quality setting is on the left and the high quality setting is on the right. You should therefore set all the options to the option shown on the right. The only possible exception to this is “Projector Speed” which affects how fast text is displayed. This option can be set to taste.

At the bottom of the screen there are two options, “Panel Permutation” and “Trenchcoat Preference”. These change minor cosmetic elements of the game and can be set to taste.

When you are done configuring these options, simply click on any other icon to leave the menu. You’re now all set to command your cyborgs and increase profits for EuroCorp or bring glory to the Church of the New Epoch, good hunting!

Dust: A Tale of the Wired West


Genre: Adventure
Release Year: 1995
Developer: Cyberflix
Publisher: GTE Entertainment
Age Rating: 15+
Playability Status: Perfect (Windows 3.1 required)
Tested On: Windows 7 x64, Windows 8 x64
Availability: Copyright retained - Out of print/unavailable

There’s a stranger in Diamondback, and that stranger is you partner. In this western themed adventure game you must make your fortune and get revenge on “The Kid”, who cheated against you during a high stakes poker game, leaving you without a gun or a buck to your name.

Dusty relics

We were not able to get Dust: A Tale of the Wired West to work natively on our modern PCs. The only way to run the game reliably on a modern PC is to use DOSBox and a copy of Windows 3.1. Setup DOSBox and Windows 3.1 according to our tutorials here.

Installation

To install the game in Windows 3.1, insert your Dust CD-ROM into your computers optical drive then Start DOSBox and Windows 3.1, making sure that your optical drive is mounted in DOSBox. Open the Main group and start File Manager. Click on the CD icon at the top of the window and then run the Setup.exe file in the list of files on the right. Installation should then begin automatically. When asked what components you wish to install, you can select all options.

On our test machine, the installer failed to properly detect how much hard drive space we had and refused to install the game claiming that there wasn’t enough free space. If this happens, exit the game and run “setup.exe” again. A message should appear that says “Are you having trouble installing DUST?”. Click “Yes”. and then “Yes” again. This will launch an alternative installer. Simply follow all the on-screen prompts and choose “Large” install when asked what type of installation you want to perform.

When installation is complete, the installer will prompt you to install two “enhancements”, namely the WinG and Win32s components. if you followed our Windows 3.1 setup tutorials, these components should already be installed.

For those of you wanting to try the game on more modern versions of Windows, note that the game uses a 16 bit installation program meaning it cannot be installed on 64 bit versions of Windows. By installing the game on an older computer and then copying the files and registry keys manually, the game can be made to launch on 64 bit operating systems. Writing a replacement installer would be possible but since we weren’t able to get the game to work correctly in this situation we have not produced one. For reference, the game stores its registry keys under HKEY_LOCAL_MACHINE\SOFTWARE\Cyberflix\Dust

Playing the game

Before starting the game, you may want to change the screen resolution in Windows 3.1 to 640×480 with 256 colours. See this tutorial if you don’t know how to do that. You can start the game by opening the Cyberflix group and then clicking on the “Dust” icon.

Below are the notes we compiled when trying to get the game working directly on a more modern version of Windows.

Windows 8

Running the game in Windows 8 was the most problematic. The game would only run once, then require a complete reboot of the PC before it ran again. While running the game, certain areas on the screen were missing. This affected the menus and made navigating to save and load impossible, for instance. None of the compatibility mode options were able to fix this problem.

Windows 7

Running the game in Windows 7 was significantly more successful. By setting the game to Windows 95 compatibility mode and by using a batch file that shut down Windows Explorer before starting the game (the same method we used with Titanic – Adventure out of Time) we were able to get the game to start. Navigating around and talking to characters then worked fine, with no graphical corruption. Sadly, when we tried to save or load a game, the game just crashed back to desktop.

Windows XP Virtual Machine

In our tests Dust: A Tale of the Wired West did NOT work on a Windows XP virtual machine. The game simply crashed immediately upon launching.

Can you submit a fix?

Know how to get this game working without the need for DOSBox and Windows 3.1? Help the community by submitting a comment and letting us know!

Screenshots

Click on any screenshot to see a bigger version.

A friendly local comes to chat.

A friendly local comes to chat.

Practising your shooting.

Practising your shooting.

Doom & Doom 2


Genre: First Person Shooter
Release Year: 1993
Developer: ID Software
Publisher: Id Software
Age Rating: 18+
Playability Status: Perfect
Tested On: Windows 8 x64
Availability: Copyright retained - Still sold

Doom’s significance to video game history is rarely debated. While not the first ever first person shooter, Doom is often credited with popularising the genre and introducing gamers worldwide to the guilty pleasure of multi player ‘death matches’. Back in 1993, Doom’s fast, frantic gunplay and realistic looking enemies earned it plenty of controversy as the gaming world got a taste of just how violent games could get. By modern standards of course, the game seems anything but realistic, but for those of us who fell under the games spell originally, the chance to Doom ourselves again is just too good to miss.

Playing Doom on modern PCs

To play Doom on a modern PC you need two things. Firstly, you need a way to run the Doom game engine on your modern PC. Secondly, you need some WAD files. These are the level files from either Doom, Doom 2 or perhaps from a user created or special level pack. Finding the WAD files should be easy. If you have an original CD copy of the game, you can find them on your game disc. If not, you can still buy Doom and Doom 2 from popular digital download services such as Steam.

Deciding how to run the Doom game engine is a little more tricky. The enduring legacy of Doom means that there are dozens of ways you can go about playing the classic title on your modern PC. ZDoom, GZDoom, Skulltag and Odamex are just a handful of Doom game engines that have been updated for modern PCs. These replacement game engines bring Doom to your modern PC with a host of enhancements that wouldn’t have been possible on the PCs of the early 1990s. Of course, if you want to play the game just like it was back in the day, you could also use DOSBox. There’s no right or wrong way to go shotgun a demon, but in this article we will be focusing on a program called Zandronum.

We chose Zandronum for this article since it is still actively developed and has excellent support for multiplayer matches. You can download the latest build of Zandronum here. Be sure to select the “Installer (Bundled with Doomseeker)” link. Once the download has completed, double click on the file or choose “Open” or “Run” from your browsers download manager. This will start the installation process. Once installation is complete, it is simply a matter of copying the WAD files to your hard drive.

Look at my WAD

Using WAD files with Zandronum is pretty easy. If you’re looking to play an original copy of the game, simply insert the CD-ROM (or even the floppy disks if you can find a suitable floppy drive) into your computer. Now, create a new folder anywhere on your computer and simply copy the entire contents of your original game disc(s) to the folder. Repeat the process for each version of Doom or Doom 2 you want to install. Make a note of where these directories are as we will need to tell Zandronum where to find these files later.

If you purchased Doom from a service like Steam, the WAD files will already be on your hard drive as soon as you install the game, you simply need to figure out where. By default Steam games are installed to “C:\Program Files (x86)\Steam\SteamApps\common”.

Depending on how old your WAD files are, you may need to patch them before you play. If you are trying to play Doom 2, the Ultimate Doom CD-ROM or the Steam version of Doom you do not need to do this as your WAD files will already be up to date. If you have an earlier copy of the game however, patching may be necessary, but don’t worry the process is very straightforward.

To patch a WAD file, first download the Java IWAD Patcher program here. The file is downloaded as a zipped folder, so simply extract the contents to any folder on your system once it has downloaded. IWAD Patcher is a Java program and so you will need to have Java installed on your PC in order to run it. You can get Java here if you don’t have it already. To use the WAD patcher, simply click on the “JIWadPatcher” file. A small window will then appear.


wad-patcher


Click on “Choose an IWAD and patch it” then simply browse to your WAD file. If the file needs patching the program will go ahead and patch it, otherwise it will let you know that no patching is necessary.

Running Zandronum

The first time you start Zandronum, the window shown below will appear.


zandronum-start


Simply click on “Browse…” and browse to the directory where you copied your Doom WAD files. Zandronum will automatically detect the correct files and then start.

If you ever need to add additional WAD files (for instance, if you want to add Doom 2 as well as the first Doom) you will need to edit a file within the Zandronum directory. The file will be called zandronum-(username).ini, where “username” is your account name. Open this file in Notepad or your preferred text editor and find the section beginning “[IWADSearch.Directories]”. This should be right at the top of the file. Below the last line beginning “Path=” add a new line. On this line enter “Path=” and then type the path to your Doom WAD directory (do not type the quotation marks). So for instance the line might read “Path=D:\Games\DOOM” if your DOOM WAD was copied to “D:\Games\DOOM”. If you’re unfamiliar with editing files like this, see this tutorial.

If you have several WAD directories, Zandronum will ask you which one to load each time you start the program.

Tweaking visual quality

Zandronum has dozens of options for improving the visual quality of Doom, choosing which options to use often comes down to a matter of taste. Start the program and from the main menu, use the arrow keys and enter to choose “Options”. First of all you should choose a video mode, so move down to “Set Video Mode” and press enter. There are several options to configure on this screen. If you are using a widescreen monitor, make sure that “Aspect Ratio” is set to “16:9”. Renderer should be set to “OpenGL”. Naturally, for the most immersive gameplay the “Fullscreen” setting should be set to “Yes”, though you may want to set it to “No” for now while you follow this guide.

For the best image quality, you should choose your displays native resolution. For 1080p displays, for instance, that is 1920×1080. Choose this from the list of modes at the bottom of the screen and then press enter. Press the escape key when you are done configuring these options.

Before you go any further, exploring the rest of the settings we talk about here should be considered an optional step. If you’re the kind of person that baulks at the idea of wading through settings menus and options then simply jump down to the “Tweaking sound quality” section of this guide. The rest of the visual settings will only make a minimal difference to the game anyway.

For those of you who do want to tweak, your next port of call is the “Display Options”. There are a mind boggling number of options available here, so we’ll just look at a few that affect visual quality. Our recommendations here should be considered guidelines only, you may need to dial back some of these settings if your PC does not run the game smoothly.

Rocket Trails, Blood Type and Bullet Puff Type – For these settings you can choose between “Sprites” and “Particles” (or both in some cases). Sprites are generally more detailed, so choose “Sprites” or “Sprites and Particles” if your PC is relatively modern.

Stretch Short Skies – Leave this On. Without it the sky textures may not repeat properly on high resolution modes, this effect can actually cause motion sickness.

Cap Framerate – On very fast PCs this may be necessary if the game doesn’t appear to run smoothly.

Once you have configured these settings, there are even more visual quality settings on the “OpenGL Options” menu. Select this menu and you can configure the following options.

Vertical Sync – Turn this ON to eliminate screen tearing

Rendering Quality – Set to “Quality” for best results

Dynamic Light Options – For best quality, turn on all the sub-menu items under “Dynamic Light Options” except for “Force Additive Lighting”.

Texture Options – Textures should be enabled. For best quality, set the filtering mode to “Trilinear”. “Anisotropic filtering” should be set to 16X and “Enable Hires Textures” should be set to “Yes”. “High Quality Resize Mode” can be set to taste, each of the filters available here will have a subtly different effect on the textures. “Resize Textures”, “Resize Sprites” and “Resize Fonts” can all be set to “On”.

Shader Options – Again, turning all these options on is theoretically the best option for highest visual quality. Using “Shaders for Fog” can have a detrimental effect on sprites when standing close to them however, so you might want to keep this one turned off.

Preferences – As you might expect, these are settings that can be set to taste, rather than there being a right or wrong setting for best quality. Experiment and see what you like best.

Finally, before you leave the Display Options menu, you might want to go into the “HUD Options” sub-menu. Doom originally had a HUD (heads up display) at the bottom of the screen which showed you your health, ammo and various other settings. If you cannot see this while playing, try reducing the “Screen Size” option down by one notch, it should then appear. Other options on this menu can be set to taste.

We’ve breezed through these options as there really are too many to go into excruciating detail. If you need more help, check out the Zandronum forum or the Zandronum wiki.

Tweaking sound quality

Sound options can be configured by going to the “Options” menu and then choosing “Sound Options”. Settings such as volume can obviously be set to taste, but make sure you set “Output Format” to “32-Bit” for the best possible quality. “Speaker Mode” should be set to match whatever speaker setup you currently have. Change it to 5.1 or 7.1 if you have a surround sound system, for instance.

With sound and visual options tweaked to taste, you are finally ready to fight the forces of hell. Good luck marine, we’re counting on you.

Multiplayer

Playing Multiplayer with Zandronum is very easy. Most servers will require you to have Doom 2 in order to play online. Simply start “Play Zandronum (online)” from the Start menu or Start screen. A “Doomseeker” window will then appear with a list of servers you can connect to. Such is the enduring popularity of Doom that there are usually opponents online to play against any time of day. Choose a server close to you geographically for best results, then right click on the server and choose “Join”. If everything goes smoothly you’ll shortly be duking it out in the arena. If not, try again and choose a different server.

Troubleshooting

Problems saving games or configuration settings:- Zandronum saves its game data into the same folder as the program itself. In some instances on more modern versions of Windows, this will mean that save games and configuration files cannot be written. To solve this problem you can either run the program as administrator (right click on the games icon and choose “Run as administrator”) or, better still, set the permissions on your Zandronum game folder so that your user account has full control. You can find a tutorial on how to configure folder permissions here.

Latest comments

banner-300x250